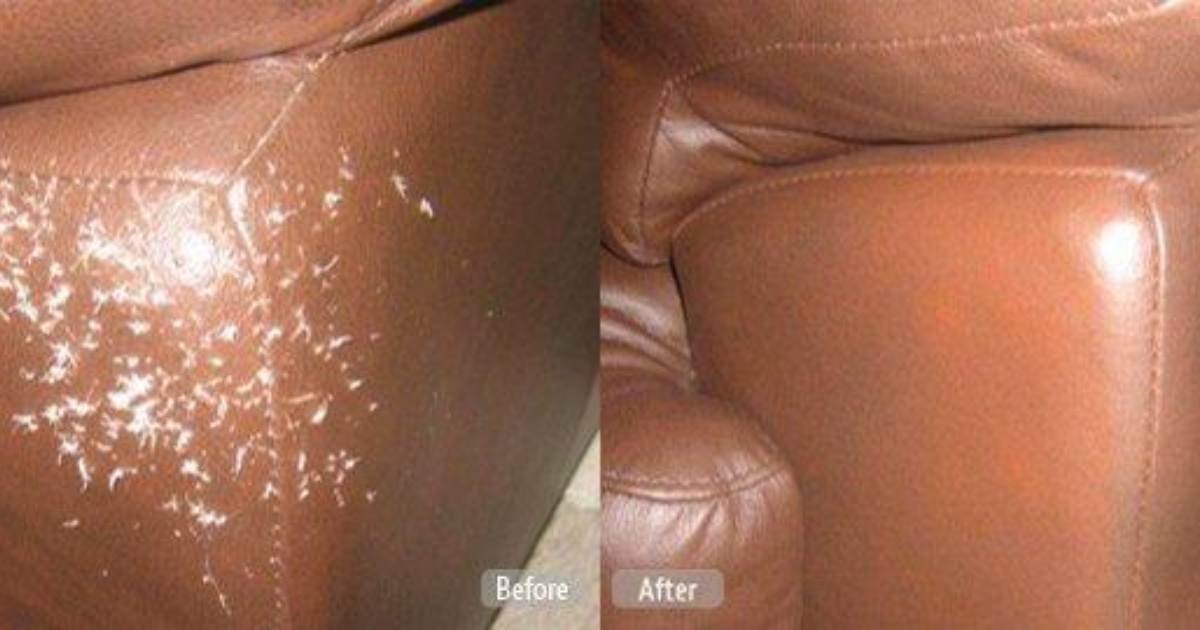
Leather couches can add a luxurious, stylish look to any living room. Over time, leather couches can start to peel and crack, leaving them looking worn and damaged. Thankfully, there are several methods you can use to repair peeling leather couches and restore them to their former glory.
Assess the Damage
The first step is to thoroughly examine your leather couch and identify areas where the leather has peeled or cracked. Check along the edges, seams, and high-wear areas like the seat cushions and armrests. Determine how severe the peeling is – is it just a small split or crack, or is large sections of leather peeling away? This will help you gauge the repair level needed.
Look for these common trouble spots:
- Edges and seams: Peeling often occurs along edges and seams first as these are vulnerable spots. Carefully run your fingers along the seams and look for gaps or cracking.
- Armrests: Armrests take a lot of wear from resting arms and elbows on them. Check for cracking and lifting leather along the tops and sides of armrests.
- Seat cushions: The seat cushions get sat on the most, so inspect for areas where the leather has cracked or split over time.
- Back and headrests: Don’t forget to check the back and headrest areas as well. These can peel from friction against clothing and hair oils.
- Flap test: Gently lift edges of leather around damaged spots to see if large sections peel up easily. This indicates poor adhesion underneath.
Clean the Leather
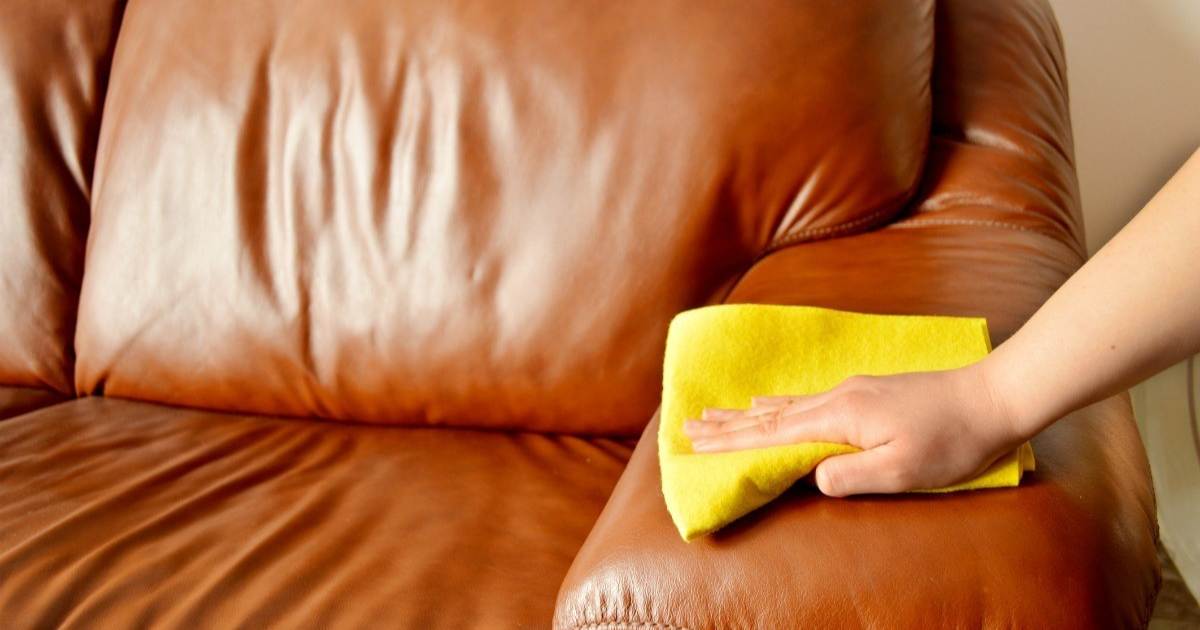
Before beginning repairs, thoroughly clean the leather with a leather cleaner and conditioner. This will remove dirt, oils and debris that could impede adhesion of repair products.
Use a clean, lint-free cloth to gently clean the entire couch. Pay special attention to soiled areas and be extra gentle on cracked/peeling sections.
- Mix leather cleaner with water per product instructions. Use a minimal amount of solution – over-wetting can damage leather.
- Work the solution into soiled areas with a soft brush or sponge using light, circular motions. Avoid excessive rubbing.
- Rinse cleaner off with a clean, damp cloth. Wipe away any suds or residue.
- Let the leather air dry completely after cleaning. DO NOT speed dry with heat which can cause cracking.
After cleaning, apply a leather conditioner:
- Choose a conditioner suited for your leather type – aniline, semi-aniline, etc.
- Apply a thin layer across all surfaces following product directions.
- Allow the conditioner to absorb completely before beginning repairs.
Thorough cleaning and conditioning ensures your repairs adhere properly for long-lasting results.
Light Peeling – Leather Fillers and Sealers
For minor peeling and cracks, using a leather filler or sealant that matches the color of your couch is an easy fix. Lightly sand any loose flaps of leather so the filler can adhere. Then apply thin layers of sealant to fill in cracks and splits per the product’s instructions. Allow proper drying time between applications. Once filled, buff the repaired area with fine grit sandpaper. Then apply a leather conditioner.
Here are step-by-step instructions for small peel repairs:
Sand loose leather edges
Use 100-150 grit sandpaper to lightly roughen and remove any lifted edges or flakes around cracks and splits. This allows the sealant/filler to grip. Be very gentle to avoid enlarging cracks. Just scuff the area enough for product adhesion.
Apply colored sealant/filler
- Choose a flexible, color-matched sealant or filler formulated for leather. Auto leather sealants work well.
- Read product directions. Shake container if needed. Test a dab on an inconspicuous spot first.
- Apply a thin layer into cracks and splits using a small brush or applicator. Fill completely.
- Let dry per product instructions. Apply additional layers until flush with surface.
- The filler may shrink slightly as it dries. Build up layers gradually for a smooth finish.
Sand and recondition
Once filling is complete, use 220-400 grit sandpaper to gently smooth and blend. Be careful not to scrub too hard. Then apply leather conditioner to protect and rejuvenate. Buff for an even sheen.
With these simple steps, minor leather damage disappears and your couch looks revived. For best results, reapply sealant/filler every 6-12 months as needed to prevent additional cracking or peeling.
Moderate/Severe Peeling – Leather Patches
If large sections of leather are cracked or peeling, using adhesive leather patches provides a more durable repair. Cut patches slightly larger than the damaged area from matching leather scraps or purchase color-matched leather patch kits. Carefully pry up any loose, flapping edges and roughen the area for better adhesion using 100-150 grit sandpaper. Apply a thin layer of flexible leather glue and securely press the patch in place. Weight it down overnight while the glue dries. Then apply sealant to the edges for a smooth finish.
Here are more tips for patching peeling leather:
Prepare the damaged area
- Use a utility knife to carefully lift any loose, separated edges. Try not to tear the leather further.
- Lightly roughen area with sandpaper to help patch adhere to leather underneath.
- Wipe away all leather dust with a clean cloth.
Cut patches from replacement leather
- Trace the damaged section on replacement leather then cut patch 1-2” wider all around.
- Use sharp scissors or utility knife for clean cuts. Round the corners to avoid peeling.
- Cut multiple patches if covering a large area, overlapping seams by 2-3”.
Glue and affix patches
- Choose a flexible glue suitable for leather like Barge or E6000.
- Spread a thin, even layer on roughened area using a small spatula or Popsicle stick.
- Quickly press the patch on top, smoothing from center outward to remove air bubbles.
- Place weight like books on top overnight as glue dries to ensure proper adhesion.
Seal patch edges
- Once dry, use a Q-tip to apply matching leather sealant around patch edges and seams.
- Let sealant dry then buff lightly with fine (400+) grit sandpaper for an invisible finish.
- Recondition surrounding leather so patch blends into couch.
With well-matched, properly adhered leather patches your couch damage virtually disappears. Take your time with prep and application and the results will look seamless.
Full Leather Replacement
For couches with extensive leather damage or wear, a full leather replacement may be needed. This is a more difficult, time-consuming process best left to leather repair professionals. They will remove the old leather, repair frame issues, then meticulously cut and fit new leather onto the couch frame. While expensive, this completely transforms the look and feel of a severely distressed leather couch.
Here’s an overview of the full leather replacement process:
Remove original leather
The old, damaged leather is carefully peeled off the furniture frame. Chemical strippers may be used to separate bonded leather. The frame is inspected for damage that needs repair.
Prepare the frame
The bare wood or metal frame is cleaned, any needed structural repairs are made, and padding or insulation is replaced if deteriorated. A new layer of padding is adhered to provide softness under new leather.
Cut and fit new leather
The replacement leather is carefully measured and custom cut to fit each section of the frame. Repair experts are highly skilled at cutting leather pieces and wrapping them snugly around curved wood or metal frames.
Adhere the new leather
Leather is bonded to the prepared frame in sections using strong adhesives and specialized stretching and bonding equipment. Leather pieces are aligned and pressed to avoid seams and creases.
Add final touches
Once adhered, excess leather along seams is trimmed. Edges are sanded smooth and treated to match the leather finish and sheen. Any decorative tufting, nailheads or brand logos are replaced.
While costly, full leather replacement completely renews the look, feel and durability of a worn leather couch. In the hands of skilled leather professionals, you essentially get a brand new couch!
Protect and Maintain the Leather
Once your leather couch repairs are complete, be diligent about protecting and maintaining the leather to prevent future peeling or cracking. Keep the leather conditioned regularly per manufacturer directions – usually every 4-6 months. Immediately spot treat spills and stains to prevent discoloration. Avoid placing leather couches in direct sunlight or close to heat sources that can dry it out. And use furniture coasters under glasses/mugs to prevent damaging liquids from soaking in.
Here are some tips for keeping your leather couch looking its best:
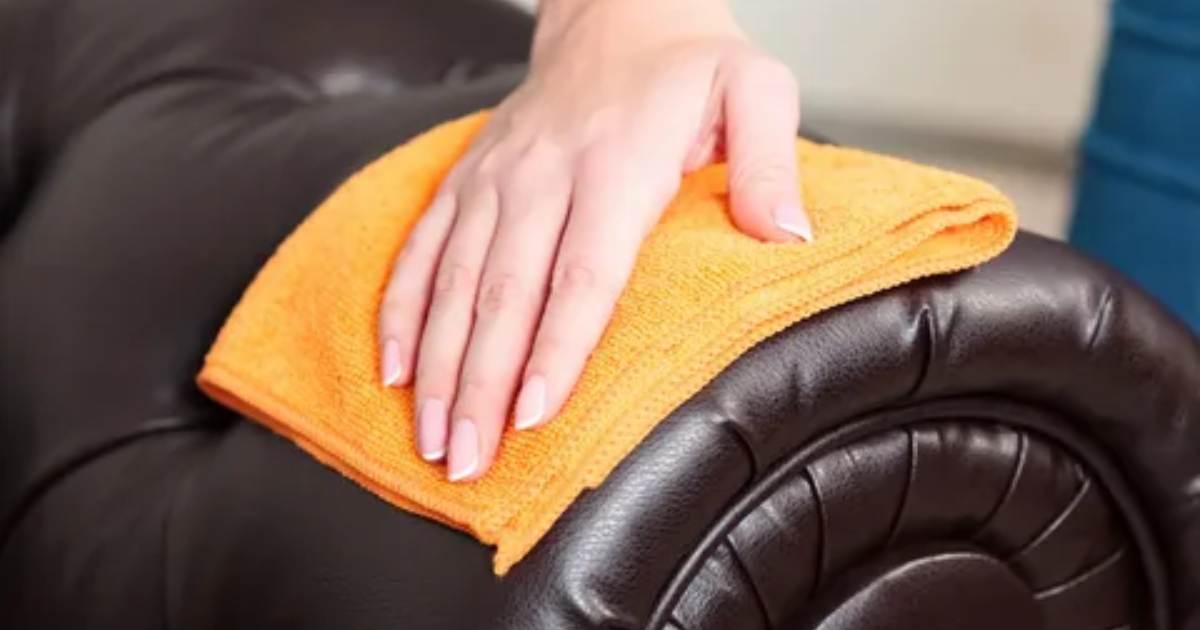
- Dust frequently: Use a clean microfiber cloth to wipe away dust and dirt, which can grind into leather and abrade the finish.
- Act fast on spills: Immediately blot liquid spills then use a clean, barely damp cloth to dab stains. Follow with a leather cleaner if needed. This prevents discoloration.
- Keep out of direct sunlight: UV rays can fade and dry out leather. Place leather furniture away from windows and bright lights. Close curtains during peak sunlight hours.
- Watch the heat: Keep leather furniture at least 1-2 feet from heat sources like radiators, fireplaces or heating vents, which can cause cracking.
- Condition regularly: Every 4-6 months, apply a leather conditioner to nourish the leather and keep it supple. Use gentle circular motions then buff with a clean cloth.
- Avoid harsh cleaners: Steer clear of hard soaps, detergents or solvent cleaners which can strip leather’s protective oils. Use only specified leather cleaners.
- Use furniture coasters Place felt or cloth coasters under all glasses, mugs and vases to guard against moisture damage from leaks or condensation.
- Keep sharpened items away: Exercise caution with keys, belts, jeans with metal rivets or sharp jewelry that could nick or scratch leather.
- Minimize direct contact: Oils from hair, skin and body residue can gradually break down leather. Limit direct contact by using furniture throws and rotating seat cushions.
- Distribute wear: Rotate cushions and flip seat cushions to even out wear and fading in high use spots like seat cushions. This prolongs the life of your leather.
Pros and Cons of DIY Leather Couch Repair
Before tackling leather couch repairs yourself, weigh the pros and cons:
Pros
- Major cost savings: DIY repairs cost a fraction of professional reupholstery or new couches. Filler and sealant kits start at around $20.
- Customize the repairs: You can personally focus on troubled spots and match leathers/colors perfectly.
- Satisfaction of saving a treasured couch: Repairing damage yourself is rewarding and preserves cherished furniture.
- Convenience of home repairs: You can repair leather damage in the comfort of your home on your schedule.
Cons
- Takes time and labor: Repairs require an investment of time and elbow grease for best results.
- Trial and error: Some testing and technique adjustment is expected when starting out.
- Irreversible mistakes: Botched DIY repairs could permanently damage the leather. Working slowly and cautiously is key.
- Limited tools/materials: You may need to purchase various sandpapers, fillers, glue, etc. if you don’t have them on hand.
- Extensive damage is challenging: Major peeling or cracks take skill to patch and blend edges seamlessly.
If you have patience, care and attention to detail, DIY leather couch repairs can be very satisfying and successful. But don’t hesitate to call in a professional for repairs beyond your skill level.
Step-by-Step Leather Couch Repair Instructions
Here is a recap of the complete leather couch repair process from start to finish:
- Assess damage: Look over entire couch and note every spot that is cracked, peeling or flaking. Check seams, edges, high wear areas closely.
- Clean leather: Mix leather cleaner and thoroughly clean entire couch. Allow to completely air dry. Apply leather conditioner and let absorb in.
- Sand loose edges: Use 100-150 grit sandpaper to lightly roughen/remove any lifted edges or flakes around damaged areas.
- Apply sealants/fillers for minor damage: For small cracks and splits, fill in with thin layers of color-matched leather sealant. Allow proper drying time between coats.
- Adhere patches over damaged leather: For peeling sections, glue color-matched leather patches in place slightly larger than damaged areas. Let glue fully dry.
- Seal patch edges: Brush matching sealant around patch edges for invisible seams. Allow to dry.
- Smooth and finish repairs: Once fillers/patches dry fully, buff with 400+ grit sandpaper. Then apply leather conditioner.
- Maintain frequently: Keep your repaired leather couch looking its best by dusting and cleaning regularly and applying conditioner every 4-6 months. Enjoy your revived leather furniture.
With a methodical approach, patience and proper materials, you can successfully repair peeling or cracking leather on your well-loved couch. Get started today and breathe new life into damaged leather.
FAQ’s
Can you repair a peeling leather couch?
It depends on the type and severity of the peeling, but in most cases, you can repair a peeling leather couch with a leather repair kit and some patience.
What causes leather couches to peel?
Leather itself rarely peels, but finishes, dryness, or bonded leather can be the culprits.
How do you fix peeling vinyl on a couch?
Apply heat and pressure with a vinyl patch kit or fabric glue for minor tears, or replace larger sections with matching upholstery fabric.
How do you repair fake leather?
Depends on damage – minor scratches? Buff with conditioner. Tears? Patch or glue with specific faux leather adhesive. Peeling? Stain exposed fabric or replace panel.
Can peeling faux leather be repaired?
Yes, peeling faux leather can be repaired to varying degrees of success, depending on the severity and desired outcome.
Conclusion
A peeling leather couch no longer looks nice in your home. But do not worry! With some simple supplies and steps, you can make your couch look good as new. First, remove all loose flakes of leather with a utility knife. Be very careful not cut yourself. Then, use fine-grit sandpaper to gently smooth rough areas. Wipe away dust with a clean cloth. Next, apply a special leather conditioner or protection cream with a soft cloth. Rub it all over the exposed leather. Let it dry completely. Last, put a leather protector spray on top. This will prevent further damage and keep your couch looking great for many more years.
Now your couch should look like you just bought it from the store. Be proud of your work and enjoy time relaxing on the repaired leather with friends and family. Remember to keep applying protector cream every few months to maintain the beautiful leather finish. With basic care, your couch will bring you comfort for a long time to come. Always take good care of your possessions so they can be enjoyed.